Spring arrives quickly in San Antonio, Texas and so does the heat. Before summer temperatures climb into the 90s and beyond, now is the perfect time to inspect your outdoor AC unit. A simple spring AC maintenance routine helps you avoid breakdowns, lower your energy bills, and extend your system’s life. In this guide, we walk you through a clear HVAC spring checklist that any homeowner can follow.
Why Spring AC Maintenance Matters
After months of sitting idle through a mild Texas winter, your outdoor condenser unit may have collected debris, dirt, and even minor damage. Additionally, skipping this seasonal inspection often leads to costly repairs during peak summer months. Consistent outdoor AC unit maintenance helps your system run efficiently from day one of the cooling season.
Furthermore, the U.S. Department of Energy estimates that a well-maintained air conditioner can use 15% less energy than a neglected one. Therefore, a few hours of preparation now can translate into real savings on your electric bill all summer long. Most importantly, it keeps your family comfortable when San Antonio temperatures peak.
Clearing Debris Around the Outdoor Condenser
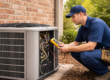
First, walk outside and take a good look at your condenser unit. Over the winter, leaves, twigs, dirt, and even grass clippings accumulate around the base and inside the unit. Additionally, plants and shrubs can grow surprisingly close during the cooler months.
To keep airflow optimal, follow these steps:
- Remove all leaves, sticks, and debris from the top and sides of the unit.
- Trim any vegetation growing within 2 feet of the condenser on all sides.
- Clear away any mulch or soil that has piled up against the unit’s base.
- Check underneath the unit for any trapped moisture or standing water.
Consequently, proper clearance allows the condenser to pull in fresh air efficiently. Blocked airflow forces your system to work harder, which raises energy costs and shortens its lifespan. For this reason, we recommend clearing the area before you run the AC for the first time each spring.
Cleaning Condenser Coils Safely
Next, turn your attention to the condenser coils. These aluminum fins wrap around the outside of the unit and release heat from your home. Over time, however, dirt and grime coat the coils and reduce their ability to release heat effectively.
What You Need
- Garden hose with a gentle spray nozzle
- Soft brush or coil fin comb (available at hardware stores)
- Commercially available coil cleaner (optional)
How to Clean the Coils Safely
Before you do anything, turn off the power to the unit at your outdoor disconnect box or breaker panel. Safety always comes first. Then, use your garden hose to rinse the coils from the inside out, pushing dirt outward. Spray gently never use a pressure washer, as it can bend the delicate fins.
Additionally, if the coils look heavily soiled, apply a no-rinse coil cleaner spray and let it foam and drip away naturally. After cleaning, straighten any bent fins carefully with a fin comb. Finally, allow the unit to dry before restoring power.
However, if you notice significant corrosion or damage to the coils, contact a certified HVAC technician. Damaged coils can cause refrigerant leaks, which require professional repair under EPA regulations.
Checking for Visible Damage After Winter
Even though San Antonio winters are mild compared to the rest of the country, your outdoor unit still experiences temperature swings, moisture, and wind. Therefore, a visual inspection for damage is an essential part of your HVAC spring checklist.
Specifically, look for the following warning signs:
- Bent, crushed, or missing fins on the coil surfaces
- Rust or corrosion on the cabinet or refrigerant lines
- Frayed, cracked, or chewed electrical wiring around the unit
- Unusual gaps or separation in the refrigerant line insulation
- Loose panels, screws, or mounting bolts on the cabinet
Additionally, listen carefully when you first power on the unit. Banging, rattling, or grinding sounds indicate loose internal components or debris inside the fan housing. Likewise, if the unit vibrates excessively, the mounting pad underneath may have shifted over winter. Moreover, always check that the unit sits level on its concrete or composite pad — an unlevel unit strains the compressor and shortens its life.
If you spot any of these issues, do not attempt electrical or refrigerant repairs yourself. Instead, call a qualified HVAC professional right away.
Your Spring Outdoor AC Unit Checklist
Use this simple checklist before you run your AC for the first time this spring. Completing these tasks helps you prepare your AC for summer and spot problems early.
Spring AC Maintenance Checklist Zero Heating A/C and Refrigeration
POWER & SAFETY
- Turn off power at the disconnect box before inspecting or cleaning
- Replace the air filter inside your home before the season starts
DEBRIS & CLEARANCE
- Remove leaves, sticks, and debris from top and sides of the unit
- Trim plants to maintain 2-foot clearance around all sides
- Clear any mulch or soil piled against the base
COIL CLEANING
- Rinse condenser coils gently with a garden hose (inside out)
- Apply no-rinse coil cleaner if coils are heavily soiled
- Straighten bent coil fins with a fin comb if needed
VISUAL INSPECTION
- Check for rust, corrosion, or damaged cabinet panels
- Inspect refrigerant line insulation for cracks or gaps
- Look for frayed or damaged wiring near the unit
- Confirm the unit sits level on its pad
FIRST RUN TEST
- Restore power and listen for unusual noises (rattling, banging, grinding)
- Confirm cool air reaches all rooms within the first 15 minutes
When to Schedule a Professional HVAC Inspection
Even though homeowners can complete many of these steps safely, some tasks require a certified HVAC technician. Specifically, refrigerant checks, electrical testing, and internal component inspections go beyond what a standard AC condenser cleaning covers.
We recommend scheduling a professional tune-up in early spring — ideally before April in the San Antonio area. During a professional inspection, a technician will check refrigerant levels, test electrical connections, lubricate moving parts, and verify thermostat calibration. Moreover, they can catch issues like a failing capacitor or a worn contactor before those parts cause a complete system failure on a 100-degree afternoon.
Additionally, if your system is more than 10 years old or has not had a tune-up in the past 12 months, a professional inspection becomes even more important. Consequently, proactive maintenance is almost always cheaper than an emergency repair call in August. Zero Heating A/C and Refrigeration proudly serves homeowners and businesses throughout San Antonio, Converse, Universal City, Schertz, and surrounding communities.
Stay Comfortable All Year Long with Zero Heating A/C and Refrigeration
Whether you need HVAC repairs, maintenance, or a new system installation, our expert team is here to help. We proudly serve homes and businesses across San Antonio, Tx. with reliable, energy-efficient solutions.
📞 Click Here to Schedule a Call today at (210) 900-0824 or 📧 email info@zerohvacandrefrigeration.com to schedule your service or get a free estimate. We proudly serve San Antonio, TX, homeowners with reliable solutions to keep your home comfortable in every season.